Tools required to complete the installation.
- Stanley Knife or Scissors
- Tape measure
- Masking Tape
- Fugi II Silicone applicator
- Kitchen roll to wipe fingers
Shower Door Seal – Universal Fitting Installation Instructions
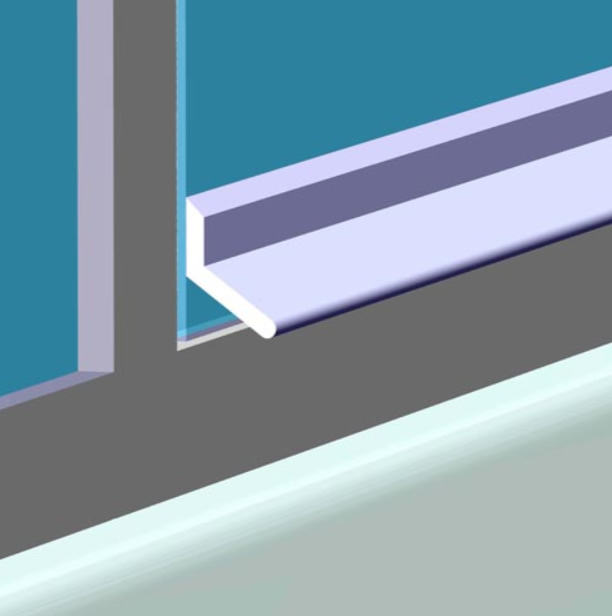
- This seal is designed to fit on the inside of the Shower Door and deflect
water into the shower tray and prevent leaks. - Measure the opening door width and cut the Shower Door Seal profile to the
same length. Note. Get yourself some masking tape at this point. - Clean the shower door at the bottom with either Methylated Spirits or the
alcohol wipe provided. Now immediately also wipe down the profile with the
wipe to remove any dirt from the seal and in particular the serrated edge side. - Open the silicone sachet that comes with the kit and apply the silicone in a fine
bead along the length of the profile on the serrated edge part only. - Note – Depending on door design you may need to trim the edge of
the seal to allow it to close into the door recess properly. This can be
done easily once the seal has been fitted and set firm.

- With the door fully open, fit the seal to the inside of the door so as the bottom
edge of the seal is in-line with the bottom of your screen door. Push gently into
place, adjust the seal so as it is straight and well seated on the glass door. - Once complete, very gently so as not to disturb the seal, wipe with your
finger or a Fugi II the sealant and remove any excess. This operation ensures
that no water gets behind the seal and weaken the adhesion. - Should the seal be difficult to hold and align, use 2 or 3 small lengths of
masking tape to hold it in place whilst it sets. - Leave for a minimum of three hours to cure and then gently try to close the
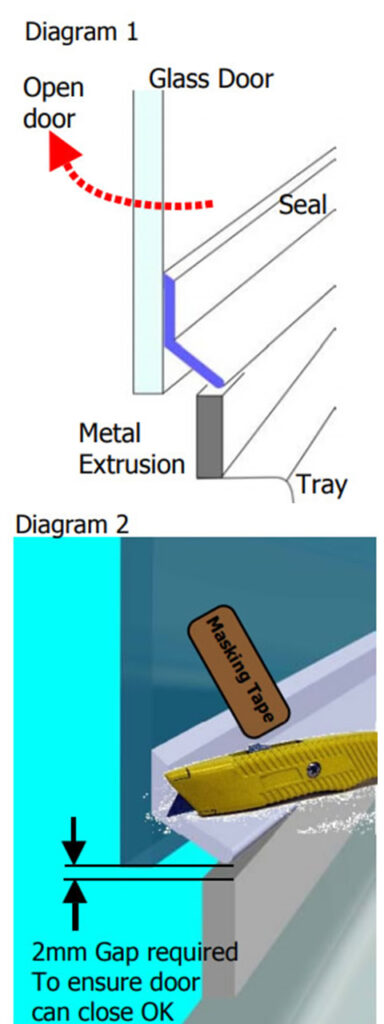
shower door. If the the door will not fully close, then trim off a slight amount of
seal as shown in diagram 2 to allow the door to close. - Once completed your shower will be virtually leak free from the bottom of
the shower door.

